





Key Takeaways About Lighting Contactor Wiring
A lighting contactor wiring setup uses a low-voltage control to switch high-current lighting safely. This summary helps homeowners and property managers know when to inspect or call a pro for safety and reliability concerns.
- Identify buzzing or flickering as signs of contact or coil issues.
- Prevent overheating by using correct conductor sizes and torque.
- Avoid live testing if you cannot confirm de-energized circuits.
- Spot discoloration smells or heat as indicators of high resistance.
- Reduce risk by maintaining grounding and secure junctions regularly.
- Plan professional diagnosis when symptoms persist or damage appears.
Introduction
Lighting contactor wiring may seem like a small part of a home electrical system but it controls large lighting loads safely. A contactor is an electrically operated switch that handles the heavy current lighting circuits need. Poor wiring or a failing contactor can cause flickering lights, nuisance tripping, or overheating at the panel. For homeowners, those symptoms point to a safety and reliability problem that deserves attention.
Safe wiring practices reduce fire and shock risks when contactors switch high currents for landscape or building lighting. Properly sized conductors, secure terminations, and correct control wiring matter more than terminal neatness alone. Grounding and overcurrent protection tie directly into how a contactor performs under load and fault conditions. Ignoring these details can escalate small issues into system failures.
Code notes matter because they set the minimum safety expectations for installations and inspections in many jurisdictions. National standards influence how electricians size wire, select devices, and protect circuits during contactor installs. Homeowners in Tomball often notice older control wiring that does not meet modern recommendations for grounding or breaker coordination. Recognizing when wiring falls short helps prioritize a professional inspection.
When a contactor fails or wiring shows wear, symptoms often include audible buzzing, intermittent lights, or burned insulation around terminals. A professional will inspect the contactor coil, measure supply and control voltages, and check circuit breaker coordination. For properties in Richmond, TX, visible damage or repeated outages should prompt a licensed electrician to evaluate the wiring and replace components as needed. Acting early reduces the chance of a small wiring issue becoming a costly safety problem.
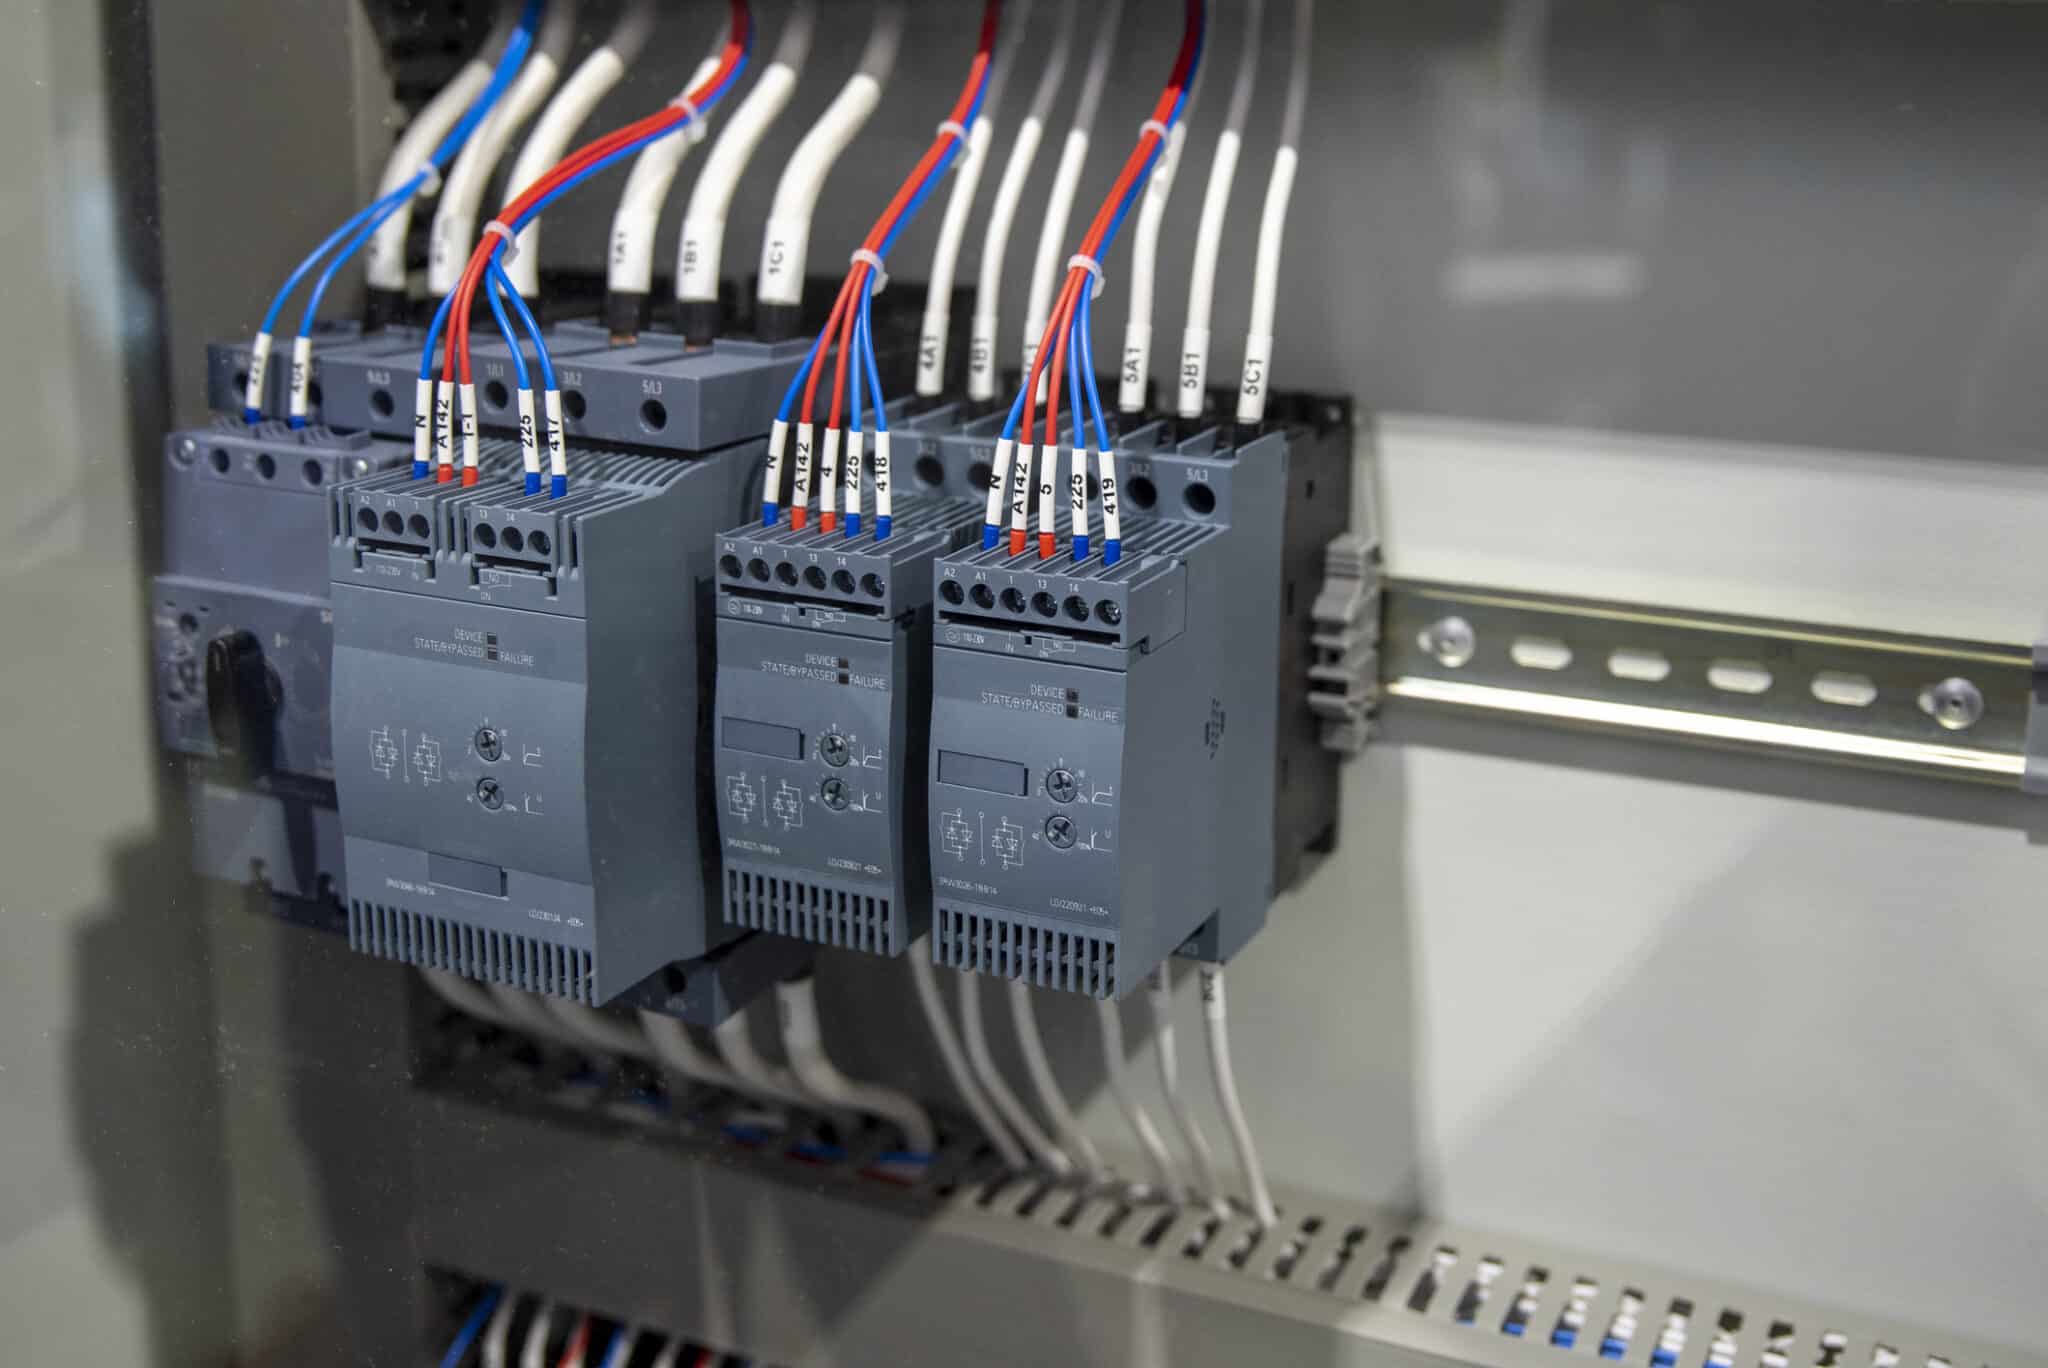
What A Lighting Contactor Does And How It Works
A lighting contactor is an electrically controlled switch that turns high-current lighting circuits on and off using a low-voltage control signal.
- It isolates control wiring from high-current lamp wiring.
- It lets small control devices operate large lighting loads.
- It reduces wear on household switches and thermostats.
- It supports automated schedules and timed lighting control.
The contactor has two main parts: the coil and the power contacts that carry the load when closed. When the coil energizes, it draws magnetic force to close the contacts and supply current to the lights. When the coil de-energizes, a spring opens the contacts and stops current flow. Homeowners often ask whether a buzzing contactor means it is failing, and buzzing often indicates a weak coil or loose connection that needs inspection.
Control voltage can be 24V, 120V, or 277V depending on the system, and the power side should match the lighting circuit rating. Proper lighting contactor wiring requires correct terminal torque, secure splices in a rated junction box, and correctly sized conductors for the load. A pro diagnosing a contactor will read coil voltage, measure load-side voltage under load, and inspect contact faces for pitting or burning. For larger lighting systems, consider the implications of load calculations and coordination with overload protection from resources like lighting load calculations.
Contactors may include auxiliary contacts for control logic or pilot lights that show status without opening the power circuit. For properties in Richmond, TX, older systems sometimes mix control voltages, which can confuse replacement parts and require careful labeling. A functional check involves energizing the coil while watching for steady contact closure and stable voltage at the fixtures. If the contactor fails these checks, replacement or rewiring is the usual next step to restore safe operation.
Common Causes Of Lighting Contactor Failures Explained
Worn contact faces cause many failures when arcing gradually erodes the metal and increases resistance at the power terminals. Heat from resistance creates dark pitting or melted spots that a visible inspection will reveal. A technician would remove power, open the contactor, and check contact surfaces with a flashlight and feeler gauge for excessive wear. If pitting or uneven faces appear, replacement of the contactor or contacts is usually required to restore reliable switching.
Coil problems show up as weak pull-in or intermittent operation when voltage supply is unstable or the coil has internal damage. A pro diagnoses coil issues by measuring coil voltage with a multimeter while activating the control circuit and listening for steady engagement. Control wiring faults, like chafed insulation or loose splices, can mimic coil failure and should be traced back to the switch or timer. Simple checks include tugging terminal screws after power-down and inspecting splices inside the control junction box for heat damage.
Loose or incorrectly torqued load-side lugs create heating and can discolor insulation on the conductors or terminal block. Under load these loose connections produce a buzzing or hot smell that homeowners may notice near the panel or fixture. An electrician would use an infrared camera or manual temperature check under controlled load to locate hotspots safely. Corrective action requires tightening to the manufacturer torque, re-crimping lugs, or replacing damaged conductors to prevent further degradation.
Incorrect control voltage or mismatched replacement parts cause premature failures when the coil rating does not match the control circuit. Miswiring the control and power circuits can also energize the coil continuously and overheat the device. For reliable operation, label control wires clearly and verify voltage before swapping parts, and consult wiring diagrams such as those used for typical light switch wiring to avoid confusion. Homeowners in Tomball and system owners in Richmond, TX should expect a professional to confirm coil voltage and part compatibility during diagnosis.
Safety Hazards From Faulty Lighting Contactor Wiring
Faulty lighting contactor wiring can create immediate shock hazards when exposed live terminals are present in junction boxes. Damaged insulation or pulled-back conductors raise the chance someone touching the box or a nearby metal plate will get shocked. A professional will first verify the circuit is de-energized with a voltage tester, then inspect termination points to confirm insulation integrity and correct grounding. If grounding conductors are missing or loose, the risk of energized metal surfaces increases and requires corrective grounding work.
Heat buildup from high-resistance connections can lead to insulation charring and smoldering that homeowners sometimes notice as a faint burning smell. Over time, this thermal damage can expose conductors and raise fire risk, particularly where control wiring passes near combustible materials. A technician diagnoses hotspots using a thermal camera or manual temperature checks after controlled operation, looking for abnormal temperature rises at terminals and splices. Repair includes replacing damaged conductors, reterminating with proper torque, and securing wires away from heat-sensitive materials.
Arcing caused by loose contacts or poorly seated conductors produces visible sparks and can pit contact surfaces rapidly, increasing both fire and equipment-damage risk. Arcing also creates conductive oxidation and carbon tracking that may bridge insulation gaps and cause unexpected energizing of nearby circuits. To confirm arcing, a pro inspects contact faces, checks for carbon deposits, and performs continuity and insulation resistance tests to reveal unintended leakage paths. When arcing evidence appears, replacing the contactor and cleaning or replacing affected wiring is usually the safest course.
Control wiring errors that feed the coil from the wrong source can allow the contactor to stick closed and run lights continuously, creating overload risk for lighting transformers and ballasts. Continuous operation raises fixture temperature and shortens component life, sometimes producing humming or high-frequency noise that homeowners hear near fixtures. Troubleshooting includes tracing the control circuit back to switches, timers, or relays and measuring control voltage under both intended and fault conditions. Corrective steps include relabeling control wires, installing proper isolation devices, and ensuring control circuits have suitable overcurrent protection.
Basic Safe Wiring Practices Homeowners Can Understand
Start by turning off power at the correct breaker and verify de-energized status with a reliable voltage tester before touching any wiring. Test both the supply and control conductors because some systems use multiple sources that remain live. Keep panel covers and junction boxes closed until testing and label any circuits found to be live to avoid mistakes. If you cannot confirm absence of voltage confidently, stop and call a licensed electrician to proceed safely.
- Use the right wire size for the load.
- Keep power and control wires separated.
- Terminate conductors in rated boxes only.
- Tighten lugs to manufacturer torque.
Choose wire insulation rated for the environment and voltage of the circuit to prevent premature aging or melting near fixtures. Secure wires with strain reliefs where they enter contactor cabinets and route them away from sharp edges or heat sources. Use color-coding or clear labels on control and load conductors so future troubleshooting is faster and less error prone. Proper labeling also helps when coordinating with subpanel circuits and branch feeds during upgrades.
Make all splices inside listed junction boxes using approved connectors sized to the conductors and protected by a cover plate to reduce shock risk. Maintain grounding continuity by bonding the contactor frame, metal boxes, and cable shields with properly sized grounding conductors. Avoid running control low-voltage cables tightly alongside high-current conductors to reduce induced interference and false triggering. For complex rewiring or subpanel changes related to lighting, review practical guidance like the subpanel wiring tips resource before starting work.
Confirm overcurrent protection matches conductor ampacity and the contactor’s load ratings to prevent overloads and nuisance trips. Inspect terminal screws for paint or corrosion and clean contacts when necessary after power removal to maintain low-resistance connections. Keep an eye out for unusual smells, buzzing noises, or warm terminals during a controlled test run, these indicate further attention is needed. Homeowners in Tomball and property managers in Richmond, TX should document any abnormalities and share them with the electrician during service calls.
Step By Step Visual Checks Before Touching Wiring
Visually inspect the contactor enclosure for gaps, moisture, or insect nests before opening any covers that protect wiring. Look for melted insulation, discoloration, or fresh soot around terminal areas that indicate recent overheating. Check that wiring entries use proper strain reliefs and that conduit or cable clamps are intact and not pulling on conductors. If you see damaged insulation or open splices, mark the location and avoid touching until power is verified off.
Examine control wiring routing and labeling to confirm the coil feed matches the expected source and voltage type. Trace each control conductor to its switch or timer to ensure the wire color and path are consistent with the control schematic. Note loose or unsupported wires that could rub against metal edges and wear through their insulation over time. Photograph the wiring condition for records and to share with an electrician when scheduling service.
Inspect the power conductors and terminal screws for signs of movement, corrosion, or uneven contact pressure at the lugs. Gently push on accessible conductors only after de-energizing to see if any pull back, which signals a loose termination requiring re-torque. Observe nearby grounding conductors to ensure they are present, continuous, and attached to the contactor mounting or enclosure. If grounding looks absent or suspect, flag it for correction before any live testing is performed.
Scan the surrounding area for heat-sensitive materials near the contactor that could be affected by elevated terminal temperatures during operation. Listen for mechanical noises like rattling or weak coil chatter when the control device actuates during a visual functional check. For concerns about code compliance or proper grounding, review resources on electrical code compliance to understand basic expectations. Homeowners in Tomball should note any recurring abnormal sounds and property managers in Richmond, TX must record findings for contractor evaluation.
When To Call A Professional For Contactor Work
Call a licensed electrician when you detect burning smells, visible melting, or repeated tripping that you cannot explain safely. These issues suggest energized components or insulation failure needing diagnostic testing and safe repair. A professional will isolate circuits and use a multimeter to confirm voltages before further work proceeds. Do not attempt live testing without proper tools and training to avoid shock or worsening damage.
Schedule service if the contactor chatters, clicks rapidly, or shows intermittent operation under load despite tightened terminals. Such behavior can indicate coil fatigue, loose control wiring, or worn contacts that require component-level checks. An electrician will perform continuity tests and measure coil voltage during operation to identify the fault cause accurately. Those measurements guide whether repair, retermination, or full contactor replacement is the correct next step.
If you notice scorch marks, carbon deposits, or discoloration on conductors, call a pro to prevent escalation into arcing or fire hazards. The technician may use a thermal camera and insulation resistance tests to locate hotspots and leakage paths safely. They will also verify grounding and check neutral-ground relationships per standard practice, often referencing resources like neutral-ground isolation for complex grounding issues. For homeowners in Tomball, timely inspection reduces risk of repeated failures and hidden damage.
Contact an electrician when control circuits are confusing or mislabeled, especially if upgrade or coordination with other equipment is needed. A professional will trace control wiring to timers, switches, or relays and confirm compatible coil voltage and control logic. For commercial or multi-zone systems in Richmond, TX, they will also check coordination with protective devices and load calculations before signing off. When in doubt, calling a pro prevents unsafe improvisation and ensures code-consistent repairs.

What A Pro Will Inspect And How They Decide Repairs
A professional begins with a live-voltage verification at the control and power feeds before any invasive testing. They record coil and line voltages under normal control conditions using a multimeter to confirm expected values. The electrician visually inspects terminal torque, conductor condition, and junction-box integrity for signs of overheating or movement. Photographs and notes become part of the diagnostic record for repair decisions and permit-ready documentation if required.
- Measure coil voltage while actuating the control.
- Load-test the circuit and observe fixture response.
- Check contact faces for pitting or carbon build-up.
- Verify grounding continuity and bond connections.
- Inspect overcurrent protection sizing and trip behavior.
Next, they perform functional checks by cycling the control device while monitoring load-side voltage and current under load. A clamp meter or ammeter shows whether current draw matches expected lamp or ballast ratings during operation. If currents are low or erratic, the tech traces wiring to find corroded connections or failed fixtures affecting contactor performance. Those readings help decide if repair, retermination, or full contactor replacement is the correct action.
Insulation resistance testing and continuity checks reveal hidden leakage paths or shorted windings that visual inspection might miss. When grounding concerns appear, professionals also test earth connection integrity and may reference ground electrode practice such as ground rod testing for related issues. If a neutral-ground issue or improper bond is found, the electrician documents findings and outlines corrective steps. Homeowners in Tomball should expect a clear report describing defects, recommended repairs, and safety priorities.
Finally, the pro balances repair cost versus long-term reliability when recommending work on control systems serving multiple zones. They consider part availability, device age, and coordination with upstream overcurrent protection when choosing replacement components. For multi-contactor systems in Richmond, TX, technicians may propose staged upgrades to minimize downtime while improving safety and coordination. Customers receive a written estimate that explains the chosen solution and the expected safety improvements.
Preventive Maintenance Tips To Extend Contactor Life
Schedule regular visual and operational checks on contactor enclosures to catch wear before failure occurs. Perform these checks with power off and document findings with photos and notes. Note any unusual sounds or drifting control times during normal cycles to flag potential coil issues. If you find surface heat or odor, arrange professional testing rather than attempting live repairs yourself.
Have a qualified electrician clean and re-torque terminal connections annually to reduce high-resistance heating risks. They will remove oxidation and confirm lug torque to manufacturer specs using calibrated tools. Ask the technician to record current readings and compare them with past measurements to spot gradual degradation. These records help decide if contact faces need replacement or the device should be swapped before damage spreads.
Protect control circuits from moisture and insects by sealing conduit entries and installing gaskets where needed to prevent corrosion. Replace aged or brittle control wiring during preventative visits, focusing on insulation condition and secure splices inside listed junction boxes. Consider adding surge protection on the control side if transient voltages have caused nuisance operation in the past. For deeper electrical-system diagnostics, review resources on arc fault diagnostics to understand how detection can reveal hidden arcing issues.
Schedule infrared scans during a controlled load run every two years to find hotspots that a visual check might miss. A pro will compare temperature trends across contactor terminals and feeders to detect developing loose connections or overloaded conductors. When replacing a contactor, document coil voltage and part numbers on the enclosure for easier future maintenance. Homeowners in Tomball and property managers in Richmond, TX benefit from keeping a maintenance log that lists dates, observations, and corrective actions taken.
Frequently Asked Questions
What is lighting contactor wiring and how does it work?
A lighting contactor is an electrically operated switch that controls large lighting loads from a low-voltage control signal. Lighting contactor wiring connects the control circuit, line (hot) conductors, and load conductors inside a listed enclosure. When the control circuit energizes the contactor coil, contacts close and send power to the lighting circuit, and when de-energized the contacts open to cut power. If you suspect damaged contacts, loose terminals, or incorrect grounding, stop and call a licensed electrician for diagnosis and repair to avoid shock or fire risk.
Why does my contactor buzz or cause flickering lights?
A buzzing contactor or flickering lights usually indicates a loose or pitted contact, coil wear, or voltage drop on the control circuit. Mechanical vibration from a weak coil or misaligned plunger can make audible noise and intermittent contacts. Loose wiring or a weak neutral can cause visible flicker and may heat connections dangerously, so turn power off and avoid touching terminals. For safety, have a licensed electrician inspect the lighting contactor wiring and measure voltage and continuity to confirm the fault.
How should a pro diagnose contactor and coil faults?
A pro starts by observing symptoms like humming, erratic switching, or lamps failing to turn on with the control signal. They shut power and inspect the contactor for burned contacts, loose terminals, or melted insulation, then test continuity across contacts. With power restored, the technician measures coil voltage and checks for proper control circuit voltage and correct relay operation using a multimeter. If tests indicate faults or the technician must access energized parts, caution is required and hiring a licensed electrician is recommended.
What safe wiring practices prevent overheating or arcing?
Use correctly sized conductors and breakers so the circuit carries load without overheating and follows panel load calculations. Keep all terminations tight and use torque-rated screwdrivers or testers to confirm secure connections. Install properly rated contactors and anti-arcing auxiliary contacts where switching inductive loads produces high inrush currents. If you see burning smells, melted insulation, or repeated tripping, stop work and call a licensed electrician for inspection and repair.
When should homeowners in Tomball call an electrician?
Call an electrician if outdoor lights fail to switch on consistently or click when the contactor energizes, indicating a wiring or contact fault. If you notice burning smells, scorch marks, or melted insulation near the contactor, stop using the circuit and call a professional immediately. Schedule service when you plan upgrades that change load or add timers to ensure lighting contactor wiring meets load and code needs. For any uncertain wiring, safety risk exists, so hire a licensed electrician to inspect, test voltage, and repair.